Add Smart Labels to a task
Put Smart Labels on a task and fill in the custom fields they bring along.
Who can do this: Everyone in the organization
Labels group related work across all projects, such as everything for clients or everything that needs a design. A Smart Label can bring its own fields along, for example the client's name and the budget: put the label on a task and fill them in.
Add a label
- Open the task. Under Labels in the panel on the right, choose Add label.
- Tick each label the task should have. Type in the search box to find a label quickly. A number after a label's name tells you how many fields it brings along.
- Choose Done.
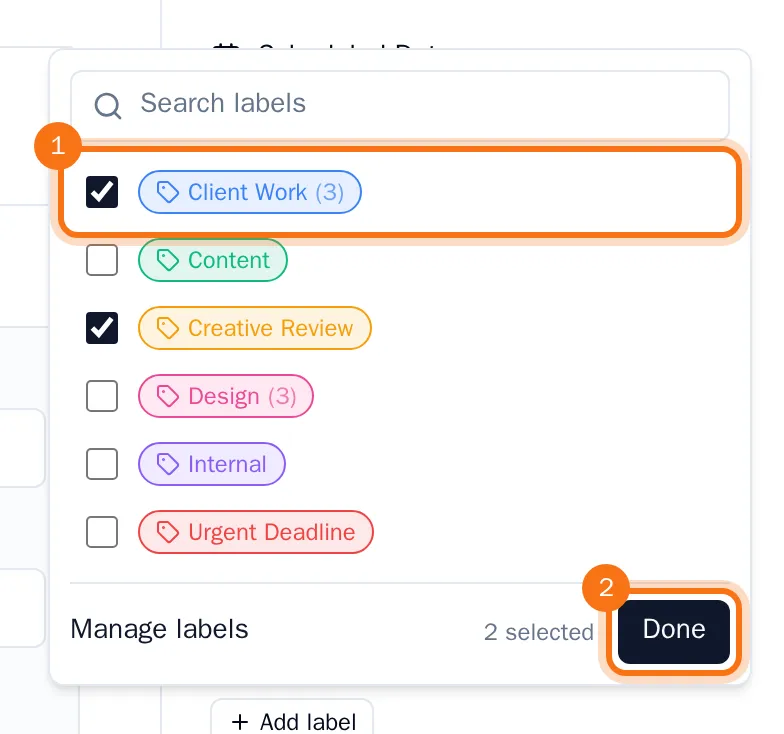
Each label you tick is saved right away and shows on the task in its color. Click the × on a label to take it off again.
Fill in the custom fields
When a label brings fields along, they appear under Custom Fields, below the description. Fill them in: every change is saved straight away.
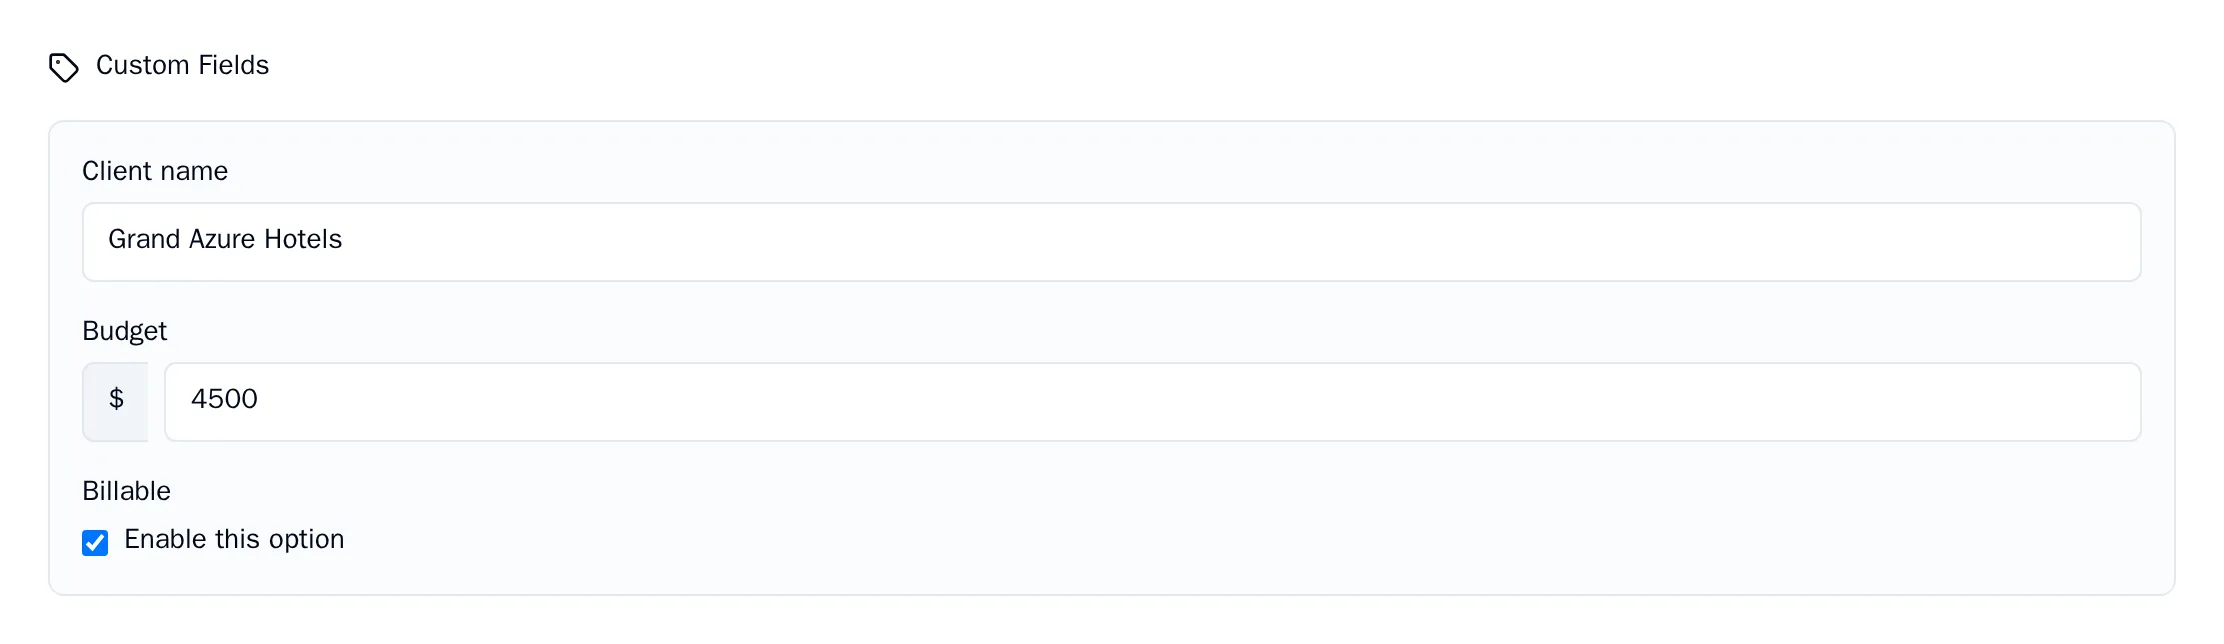
When two labels on a task have a field with the same name, the field shows only once.
Tip: Owners and admins create labels and their fields on the Labels page: choose Manage labels at the bottom of the label list. See Add custom fields to a label.