Add custom fields to a label
Give a label its own fields, such as text, an amount, a date or a choice, to fill in on every task that carries the label.
Who can do this: Owner, Admin
A label can bring its own fields. Give the Client Work label a client name, a budget and whether the work is billable, and every task with that label gets those fields to fill in. Organization owners and admins set up the fields.
Add fields to a label
- Choose Labels in the sidebar, then the pencil next to the label.
- Under Custom Fields, choose Add Field. A new field opens.
- Enter the Field Name.
- Choose the Field Type, for example Text, Number, Currency, Date, Select (Dropdown) or Checkbox.
- Select Required field if the field must always be filled in. Add a placeholder or help text if it helps people fill it in.
- Repeat for each field, then choose Update Label.
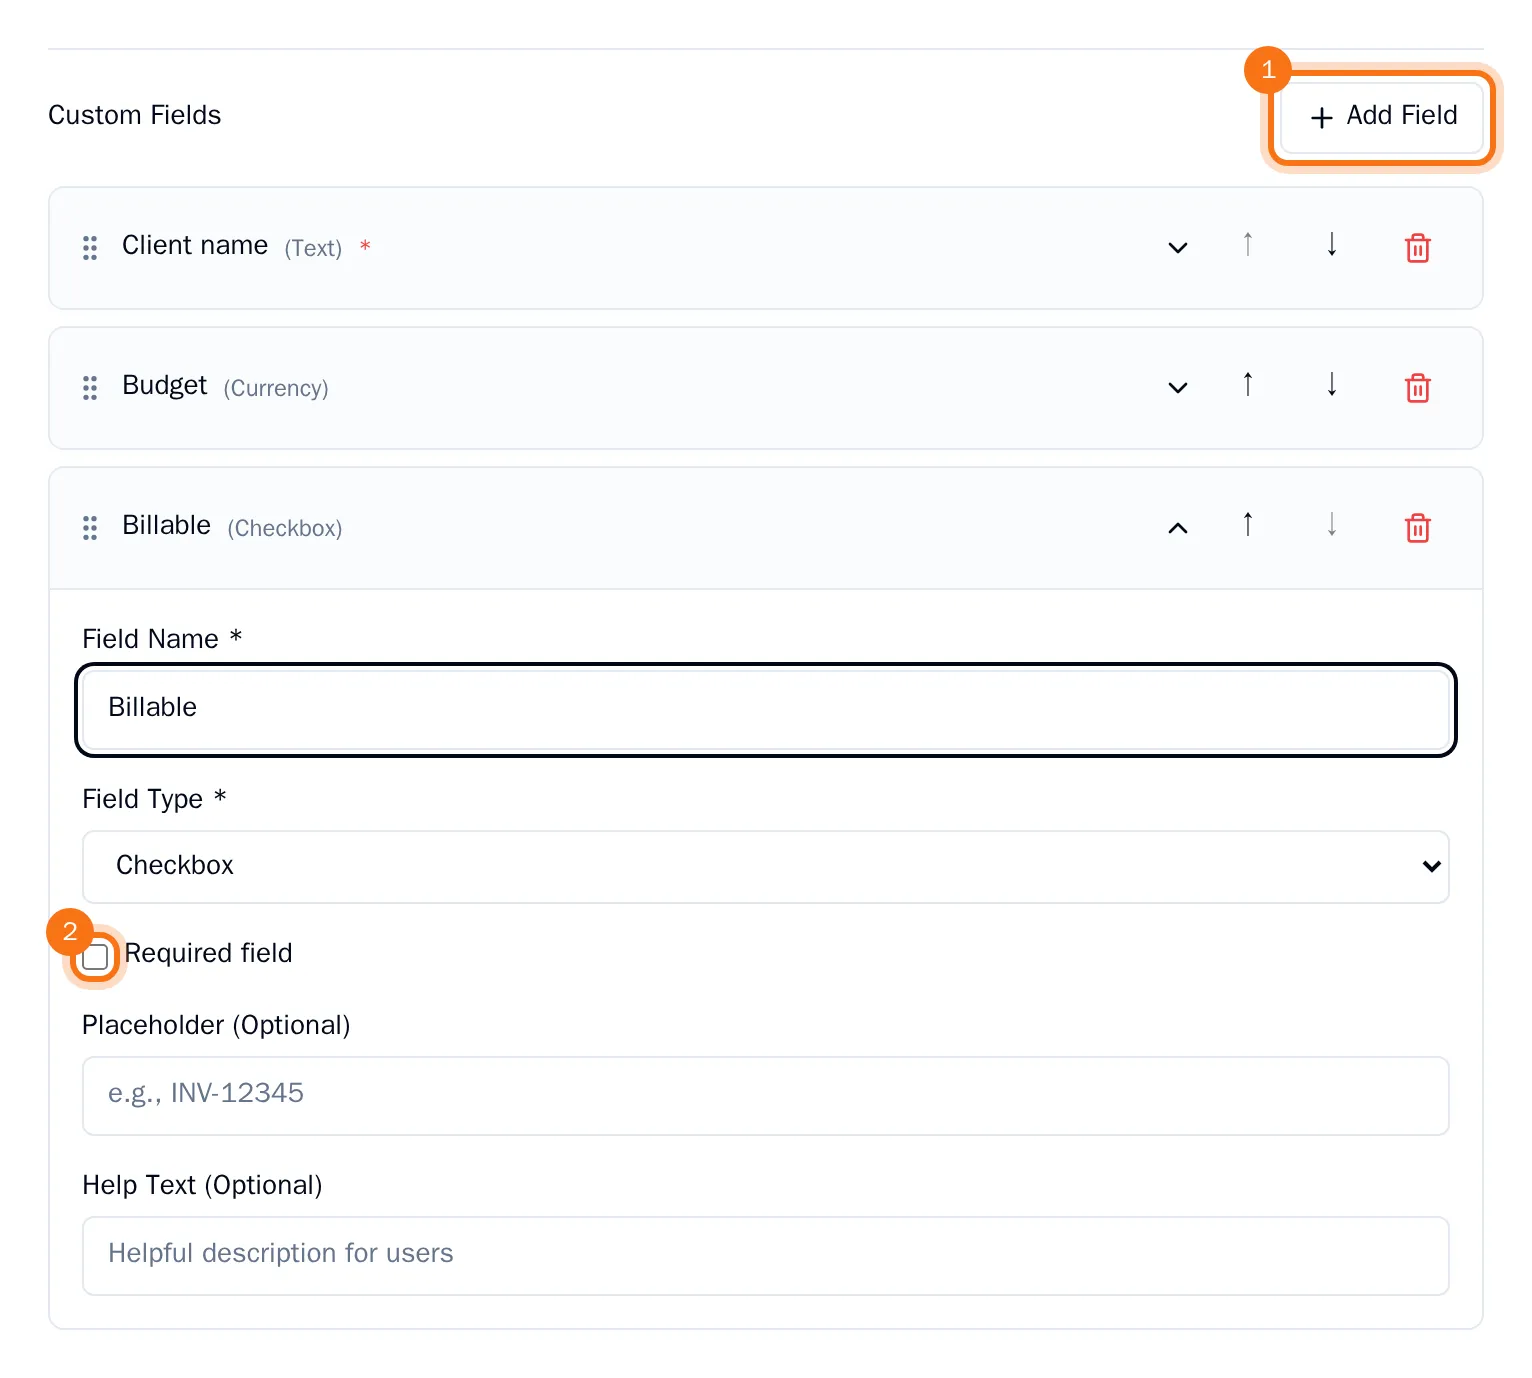
Click a field's name to open or close it. Use the arrows to change the order of the fields, and the bin to remove one.
Offer a list of choices
For a Select (Dropdown) or Multi-Select field:
- Choose Add Option under Options.
- Enter what people see in the first box, and the value to store in the second.
- Repeat for each choice.
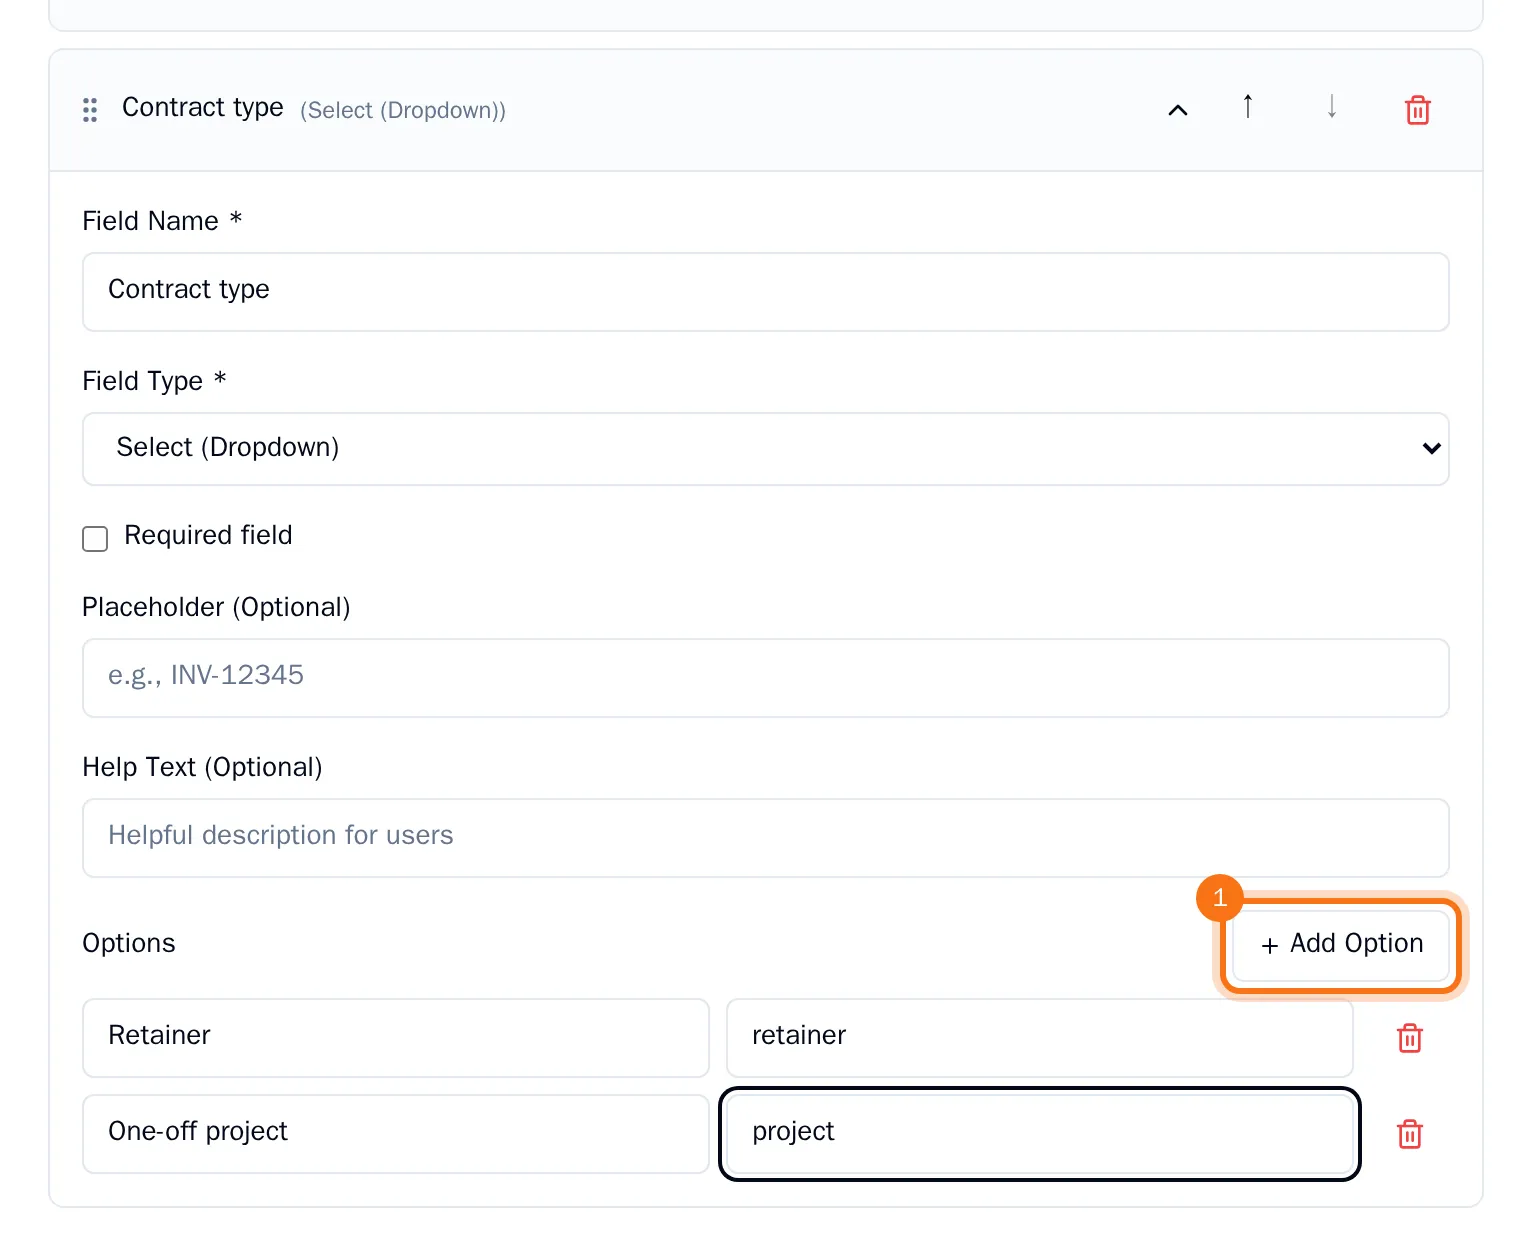
For a number or an amount, you can also set the lowest and highest value. For text, set the shortest and longest length.
Where the fields show up
On the Labels page, the label shows its number of fields. Every task that carries the label shows the fields under Custom Fields in the task, where they save as you type. See Add Smart Labels to a task.
A label field can also be required before a task enters a board column. See Add rules to a column.